Is that really wallpaper? When my friend did an accent wall for her new baby’s room using peel and stick wallpaper I knew THIS is what I needed to do for my home office wall! It’s either scroll Pinterest and dream of ‘someday’ upgrading my office decor or make today I do something about it.

And wow were there tons of options using wallpaper for bedrooms, kitchens, bathrooms, living rooms, and office spaces.
And yes, it is literally peel and stick adhesive wallpaper… and removable! Meaning, if you don’t align it with the first placement onto the wall, you can unpeel it and give it another try again and again. Oh, and it’s mess-free!


How to choose the right pattern
For my Home Office, I knew I wanted to freshen up the wall behind me. I do a lot of videotaping for my branding business and was ready for a new brighter, cleaner look than the builder-beige walls that darkened the room. This wall is seen behind me on every video recorded in my home office. Although the gallery wall worked for a few years, it was needing a more sophisticated look.

When choosing the style of peel and stick wallpaper I wanted to use for the wall I knew it needed to fit my brand style and be white. My main focus was to lighten the room up and create a more sophisticated feel!
I think every brand should incorporate texture to their brand elements and there was no question that it would be a white brick for me!
White and gray marble is what I use as the pattern on my laptop case and desk surface. But when I spotted this white brick pattern it was the perfect WHITE hue I’d imagined.

I am using white brick for my new podcast marketing materials and knew this wallpaper was exactly the one I wanted for my accent wall!
This peel and stick vinyl wallpaper is semi-gloss and is washable and paintable as well with a smooth texture.
How much do you need to order
After I spotted this wallpaper online the next thing I needed to decide was how many rolls to order to fill the wall. This peel and stick wallpaper come in vertical rolls.
Each roll is 18′ L x 20.5” W and 30.75 square feet total. They mentioned the pattern repeated itself every 25.2” which when purchasing didn’t mean much to me, but after laying it out I understand why this would matter so much when applying it (explained below.)
After measuring my walls I knew I needed 120 square feet and that meant I would need 4 rolls of peel and stick wallpaper. Wayfair has an easy to use roll estimator on their shopping site so no need to figure this out on your own.
How much does the wallpaper cost
What I love most about this wallpaper decision is the price! Whereas painting a wall includes getting a bucket of paint, brushes, containers and drop cloth all which can cost over $75 when you are said and done. All you need for using wallpaper is the wallpaper rolls and a few simple things you have laying around the house.
The peel and stick adhesive roll wallpaper comes in several price ranges from $.16/sq ft up to $2/sq ft. If you wanted a mural you’re looking more like $300-$1,000 for the entire wall.
- The NextWall wallpaper I ordered was $1.24/sq foot so 4 rolls were around $150 with free shipping.
Here’s the exact pattern I ordered from Wayfair:
Lesly 18′ L x 20.5″ W Peel and Stick Wallpaper Roll by NextWall (Ebern Design Shop)

What you will need for application
The wallpaper arrives in just a couple days so I was anxious to get it up on my home office wall! What is great is that you only need a few tools to get the job done.
- Towel to clean your wall as it needs to be clear of dust and particles
- Sharp pair of scissors
- Sharp Exacto or Utility Knife
- Level
- Smoothing tool – I used a hardbound small journal notebook!
- Step Stool or Small Ladder

How to apply the wallpaper
After wiping down my wall with a hand towel to make sure there was no dust or cobwebs on it I started unrolling the first roll of wallpaper onto the floor.
Note: They say to keep them unrolled an hour before application but I’m not huge into rule-following so jumped right in starting from the top left corner of the accent wall. I did measure the height of my wall and cut the strip so that it would overhang a couple inches at the bottom.


For the first roll, I needed to make sure the bricks were horizontally level. In case my ceiling or sidewall wasn’t level I wanted to make sure the design was. As I lined up the top left corner and peeled away the backing from about 12 inches at the top I positioned the paper to the wall and then took a level to the bricks to make sure they were horizontal.
What’s great is that you can remove the paper and re-adjust as needed. Just make sure to only remove the backing for a few inches at a time so the sticky backsides don’t touch each other. That can get frustrating real fast.
Once the first strip was stuck to the wall I smoothed the paper to the wall with my hard journal. As I did this I slowing peeled the back off the wallpaper roll and repeated as I moved down the wall.


Once I reached the molding at the floorboard I would use my book to create a crease so it would be easier to use the utility knife to trim it.
The biggest headache
The only issue I had, in the beginning, was matching the pattern correctly so that when the second strip went up it would align. Remember above when I mentioned the pattern repeated itself every 25.2”? Well, I should’ve paid more attention to that detail BEFORE starting.
So when I put up my second strip (what was leftover from the first roll after applying the first strip) didn’t match up until a couple bricks down. So that’s where I started.


It wasn’t until I was about halfway done that I realized there was this “A-looking” mark in one of the bricks. WALLA! Once I found this it was easy sailing matching up the strips. Just match the “A’s” horizontally and the pattern stayed intact. I knew there were 11 vertical bricks between each “A” so I could easily find the pattern where I needed it.
How long did the application take?
If I had found that “A” about two hours earlier this wall wouldn’t have taken me the 5 hours (with a quick lunch break) to complete. I did this project completely by myself and honestly didn’t need an extra hand for anything. With these rolls being just a couple feet wide they were easy to handle even if I needed to peel it off the wall and try again.
There were some spots that became easier to fill by overlapping the paper and it’s completely unnoticeable. This brick design can hide a lot of flaws so keep that in mind when choosing your pattern.
- From prep time to smoothing, cutting and trimming the entire project took me 5 hours by myself.


The Final Outcome
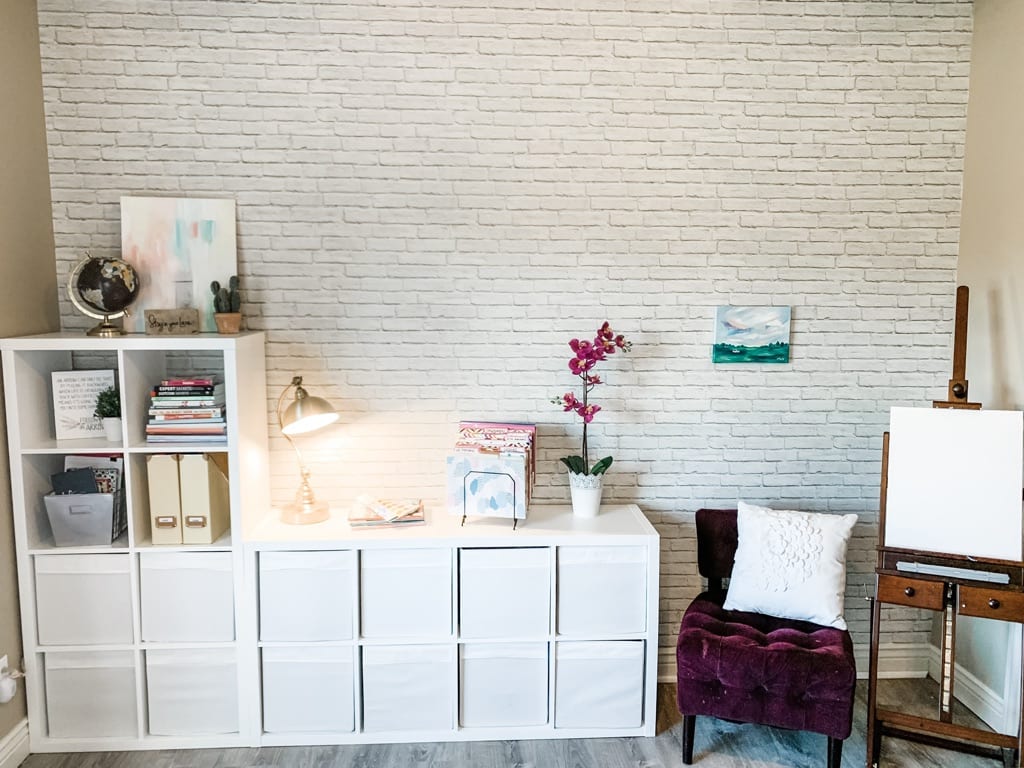
I ABSOLUTELY LOVE this accent wall. Previously, I used the two Ikea Kallax bookcases and laid them both horizontally. But to create more movement on the wall, I decided to stand one vertical and one horizontal.
Since I decided the gallery wall wasn’t going back up I used some simple decorating pieces. I placed them in the cubby spots and created movement with paintings.
I only hung one small painting on the wall above the accent chair and I used 3M Command Velcro Strips for that. You can apply nails and whatever you need to hang shelves or picture frames but for this project, they weren’t needed.
The home office space feels so much larger as well. With the brown hue leaving that one wall it has really brightened the small room and I’m excited to get to work every day in this new space. 🙂
Feel free to comment below with any questions or comments you have.


For other ways, I stay on-brand please visit my blog entry about my lifestyle photoshoot. READ HERE
Since I share awe-inspiring resources and must-have products for people like you who want to create an inspiring space, my content may contain affiliate links for products I use and love. If you take action (i.e. subscribe, make a purchase) after clicking one of these links, I’ll earn margarita-money which I promise to drink responsibly after creating more helpful content like this. All kidding aside, it’s my responsibility to let you know that an income (however small or large it may be) is made from recommending products I love, use and share with other awesome people like yourself. With your support, I’m able to commit time to this page and to each of you on your journey.