
As a solopreneur, you know that having an online presence is essential to reach new customers and grow your brand. But how do you create a website that will engage your audience and help you achieve your business goals? In this article, I will walk you through the entire process, from choosing a domain name to designing and launching your site. Plus, I’ll give you tips on how to make sure your website is optimized for search engines and mobile devices.
So whether you’re a tech-savvy entrepreneur or just getting started with web development, this article will set you on the path to success!
Steps to Building Your Website From Start To Finish
- Register your domain name
- Choose the best web hosting
- Install WordPress
- Choose a Template
- Create Your Pages
- Customize with Plugins and Extensions
- Learn More (Like eCommerce store set up, opt-in forms, email marketing, and more)
1. Setup
Ready to start building? WordPress is our go-to for website building and is the perfect solution when it comes to building your own. It comes with thousands of designs and addons which allow you to create any kind of website you can think of.
WordPress is free to download and use to build any kind of website without any restrictions. (Hosting required)
A domain name is your website’s address on the internet. This is what your users will type in their browsers to reach your site (For example, kristinkorn.com)

2. Choose the Best Web Hosting
All websites on the internet need a web host to store their website files. This will be your website’s home on the internet.
Bluehost is one of the largest hosting companies in the world. They are an official WordPress recommended hosting provider.
Bluehost offers a free domain name and site builder with templates. You can also get started for just $2.95 per month (this low price is only available through my link (due in full) if you sign up for 12 months). I suggest the PLUS plan.

You are now ready to purchase your domain name and hosting.
- Click this link, then click on the START BUILDING button.
- Choose a hosting plan for your website. Basic and Plus plans are the most popular for my clients. I suggest the PLUS PLAN. Click your choice and continue to the next step.
- On this screen you will be asked to select your domain name. I recommend sticking to a .com domain name. Once you have chosen your domain name, click on the NEXT button to continue.
- Provide your account information (name, address, email, etc.) and take a look at the extras you can purchase. I recommend waiting on these purchases for now. You can always decide at a later time to add these extras on if you choose.
- Complete this process with your payment information.
- You will receive an email with details on how to login into web hosting platform. Login and we are ready to install WordPress!
[earb post_id=”4556″]
3. Install WordPress
Now that you have your domain name and web hosting set up, it’s time to install WordPress. This will be the software that you will use to design and build your website.
Bluehost makes it easy to install WordPress with just a few clicks.
Login to your Bluehost account, then click the Login to WordPress Button to get started. Once you set up WordPress, you are ready to customize your website and its design.
Bluehost now offers a Website Builder – great for BEGINNERS! You can use this drag and drop option or log in to the DASHBOARD of WordPress and then choose a THEME as described below.

4. Choose a Template
Now that you have WordPress installed, it’s time to choose a theme or template for your website. This will be the design of your site and can be easily customized to match your brand.
WordPress themes are made for you templates that you can install on your website to change its appearance.
There are many WordPress themes to choose from, so take your time and find one that’s best for you and your business.
To change your theme, go to the WordPress admin dashboard. Visit Appearance » Themes page and then click on the ‘Add New’ button.
On the next screen, you will be able to search thousands of free WordPress themes that are available in the official WordPress.org themes directory. You can sort them by popular, latest, featured, as well as other feature filters (i.e industry, layout, etc).
Once you’ve selected your theme, click the Install button. Once you have installed your theme, you can customize it by clicking on the Customize link under the Appearance menu.
Now you are ready to launch the theme customizer so that you can change theme settings and see a live preview of your website.
You’ve now created your website without any coding!
5. Create Your Pages
WordPress comes with two default content types called posts and pages. Posts are part of the blogging functionality and appear in reverse-chronological order (newer items displayed first).
Pages are built to be static-type content such as your about page, contact page, custom landing page, etc.
To add pages to your website, go to PAGES >> ADD NEW in the WordPress Admin Dashboard.
First, you’ll add a title for your page then add content (text, links, images, audio, videos, etc.) using the text editor. Once you’ve added content to you page, click PUBLISH to make it go live on your website.
Repeat this process as many times as needed to build your website.
To add a blog post, go to POST >> ADD NEW in the WordPress Admin Dashboard.
Once again, you will add your title, then you’re ready to add content. You will notice additional options on this screen like post formats, categories, and tags to better optimize your blog.
To save your blog post, click SAVE to store your post as a draft or click PUBLISH so that it is live on your website.
How To Set Your Home Page
To set your static home page, go to SETTINGS >> READING page on your WordPress admin dashboard. Under the ‘Front page displays’ option click on the static front page and then select ‘Pages’ you created earlier for your home and blog pages. Then click SAVE CHANGES.
WordPress will now use the page titled ‘Home’ as your site’s front page and the ‘Blog’ page to display your blog posts.
How to Change Your Site Title and Tagline
You can change both your site’s title and tagline at any time by visiting the SETTINGS » GENERAL PAGE. Your site title will be the name of your website like WPBeginner. The tag line is usually a single line that describes your website. Then click SAVE CHANGES.
How to Change Comments Settings
WordPress comes with a built-in comment system allowing your users to leave comments on your posts. This is great for WordPress user engagement, but it is targeted by spammers as well.
To help with this, I recommend this setup. Go to the Settings » Discussions page and scroll down to the ‘Before a comment appears’ section. Check the box next to the ‘Comment must be manually approved’ option. Then click SAVE CHANGES.
How to Create Navigation Menus
Navigation menus allow your users to browse different pages or sections on your website.
To create or change navigation menus, go to the APPEARANCE » MENUS page. Enter a name for your navigation menu and click on the CREATE MENU button.
WordPress will now create your navigation menu. But it will be empty at the moment.
Next, you need to select the pages you want to display in your menu and then click on add to menu button. Your selected pages are now filling the navigation menu where you can move them up or down to select their position in the menu.
While the display location of your navigation menu is usually determined by your installed theme, you can change that if you desire. Most WordPress themes have a primary menu that appears in your website header. Then click SAVE MENU to save your navigation settings.
6. Customize Your Plugins and Extensions
Think of plugins on WordPress-like apps for your WordPress site. They simply allow you to customize and add features to your site.
Go to your WordPress dashboard to install plugins and click the PLUGINS page. There are thousands to choose from, both free and paid options.
Here are my top 5 plugins:
- Jetpack – tons of settings for traffic, sitemaps, sharing icons and more
- Duplicate Post – easily clone a blog article to start a new one
- Smush – makes large files small so your site runs quicker
- Easy Access Reusable Blocks – place inside articles, updates across all articles at once
- WooCommerce – if you want an easy way to accept payments or sell digital downloads
- Pretty Links – shorten long URLs with easy redirects
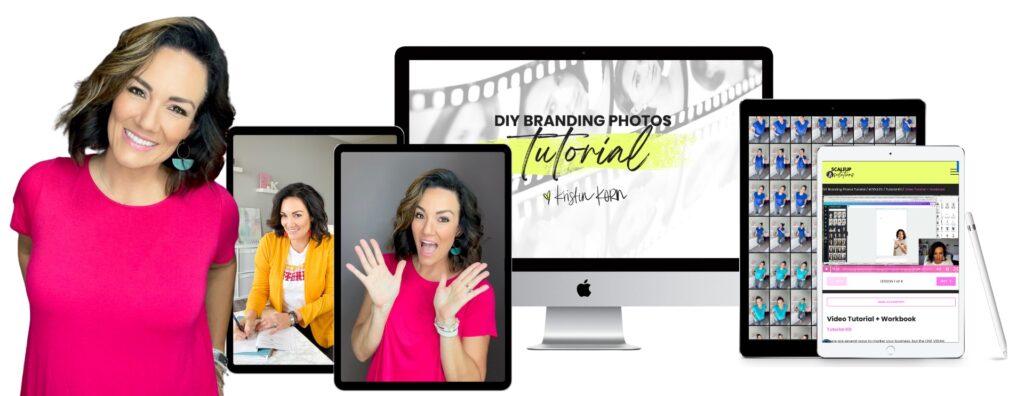
Take control of your brand’s visual story with this DIY Branding Photos Tutorial. Perfect for business-savvy women, this video kit will help you create stunning brand photos at home using just your phone and a Canva account! Get instant access here!
7. Learn More
Once you’ve mastered the setup and basics of WordPress, you can begin to explore more options. Here are just a few ideas to add to your business website.
- Add an eCommerce store (Woocommerce plugin)
- Start your own podcast (use your blog article as your Podcast script)
- Create Opt-In Forms for Newsletter or Lead Magnets integrated with Email Marketing (COREemail)
The possibilities are endless.

You’ve Got Questions
At Core Brand Marketing Group, we’ve helped many business owners begin to engage their audience and grow their business. Here are some questions we are often asked about creating a website.
Is WordPress the only platform to use when creating a website?
Over 43% of all websites on the internet use WordPress, however, there are other website builders such as web.com, wix, GoDaddy, etc. We’ve found that WordPress is the best and easiest platform to use.
How do I make money from my website?
There are a lot of ways to make money online from your website. One of our favorite ways is by setting up an online store to your WordPress website.
While there are many other eCommerce platforms like Shopify, BigCommerce, etc, we recommend using the WooCommerce plugin for WordPress. It gives you more user-friendly features at an even more affordable price. This is why WooCommerce is the most popular eCommerce platform in the market.
What’s the difference between WordPress.com vs. WordPress.org?
WordPress.org is a powerful open-source software, while WordPress.com is a limited blog hosting service.
Can I switch my site to a WordPress.org site if it was started with WordPress.com or another website builder?
Yes, you can always switch your website to WordPress. Often times beginners make the mistake of using the wrong website builder and then realize that those platforms don’t have all the features they need.
Several tutorials are available to help you switch from other website builders to WordPress. The most important part is to make sure that your permalinks (URL structure) move over seamlessly, so you don’t lose SEO rankings.
How do I grow my online presence?
Now that you have created your new website, it’s time to grow your online presence and get more traffic. Start by downloading Lead Drip 365 here!
Recap – Building Your Website
So, there you have it. Your complete guide to building a WordPress website from scratch. It’s not as daunting as it may seem – just take it one step at a time and you’ll be up and running in no time. Soon you’ll have a website that is ready to be populated with content and start bringing in traffic.
Whenever you’re ready, here are 3 ways I can help you:
- Build a Continuous Flow of New Clients Using This Simple Profit Pipeline™ – HERE!
- Turn Your Chaos Into Clarity in Just 90 Minutes with this One Call – HERE!
- Obtain the Support System You Need Inside Our Coaching Group – HERE!
Since I share awe-inspiring resources and must-have products for business builders like you who want to streamline their business – my content may contain affiliate links for products I use and love. If you take action (i.e. subscribe, make a purchase) after clicking one of these links, I’ll earn a small commission. While it has no effect on your pricing, it’s my responsibility to let you know that an income (however small or large it may be) is made from recommending products I love, use, and share with other awesome people like yourself. With your support, I’m able to commit time to this blog and to each of you on your journey!